
Earlier this year I wrote an article about connecting to AWS via a Site-to-Site VPN connection using a Synology RT6600ax router – https://bttech.uk/2023/02/02/aws-vpn-connection-from-synology-rt6600ax/. This was great for me learning at the time, but I also wanted to expand a little on this and look at making use of BGP over the VPN connection allowing for new subnets created in AWS to be advertised back to on-prem for example. As the Synology RT6600ax doesn’t support BGP I have set about testing this via a virtual pfSense firewall within my lab.
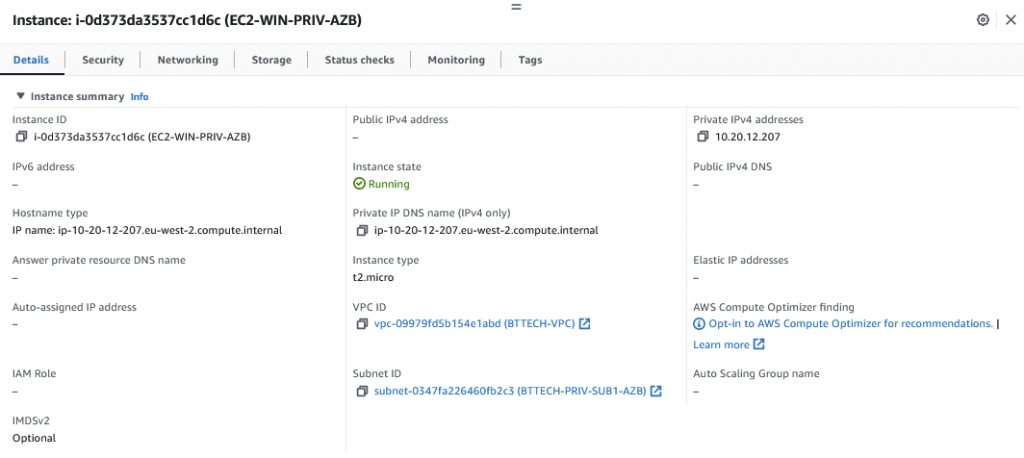
Similar to my last article I have a private EC2 instance running in AWS, no way of connecting to this without private connectivity in place as I have not configured any Session Manager Endpoints.
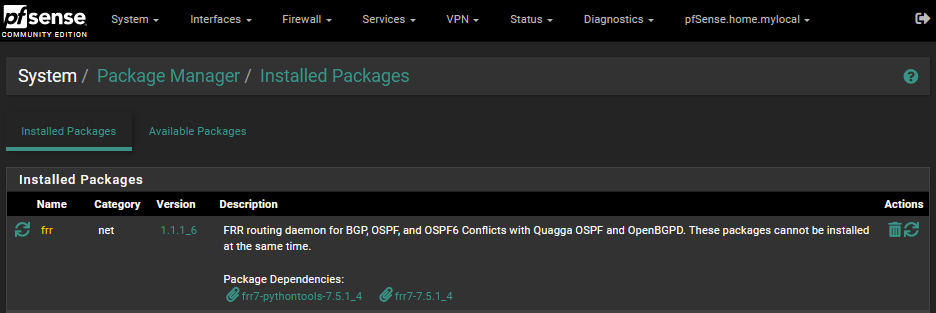
As mentioned I am making use of a virtual pfSense firewall for this lab activity. While the pfSense supports the use of BGP it doesn’t do this out of the box, to support this I installed a package via the package manager – FRR.
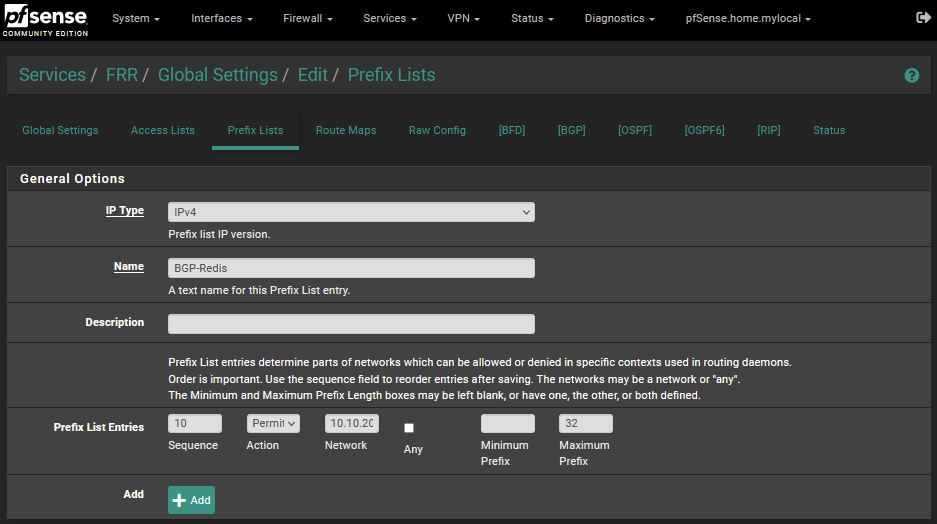
I then created a prefix list in pfSense so that I would only advertise out a single subnet from my home network.
I then created a route map where I referenced the prefix list that I had created.
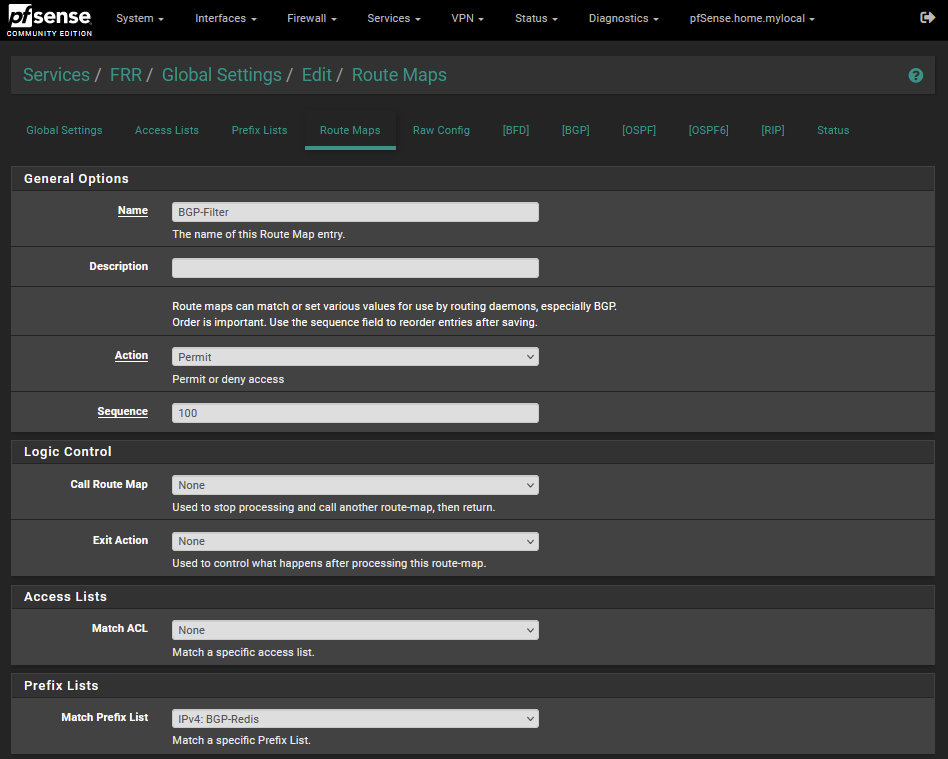
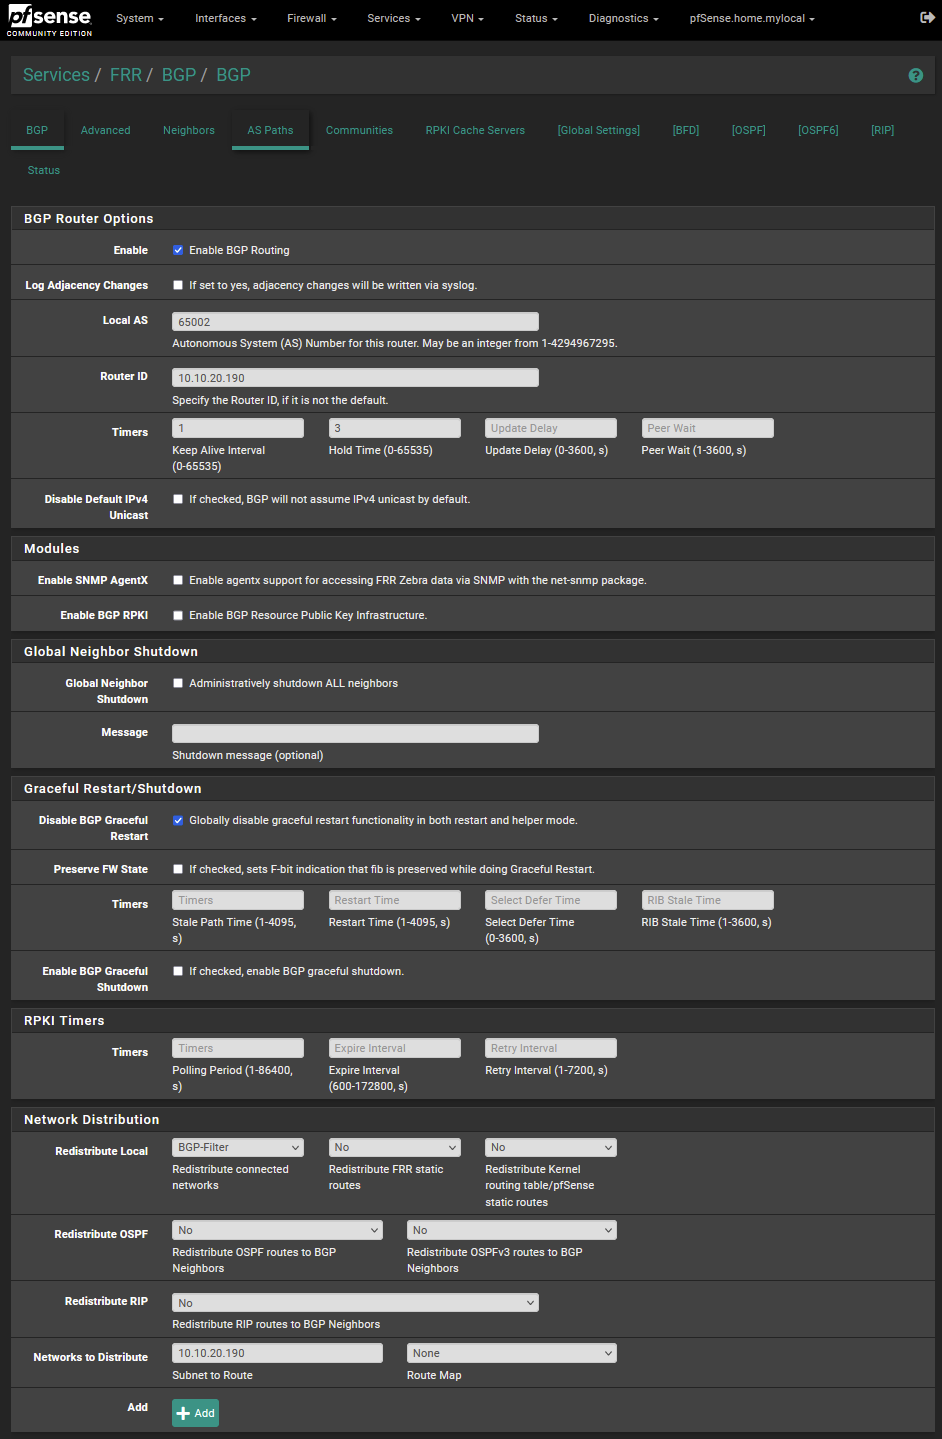
Following this I move into creating the BGP configuration, as per the below. Selected the route map that I had previously created within the route redistribution section. This way I can be sure I will only advertise into AWS the 10.10.20.128/26 subnet.
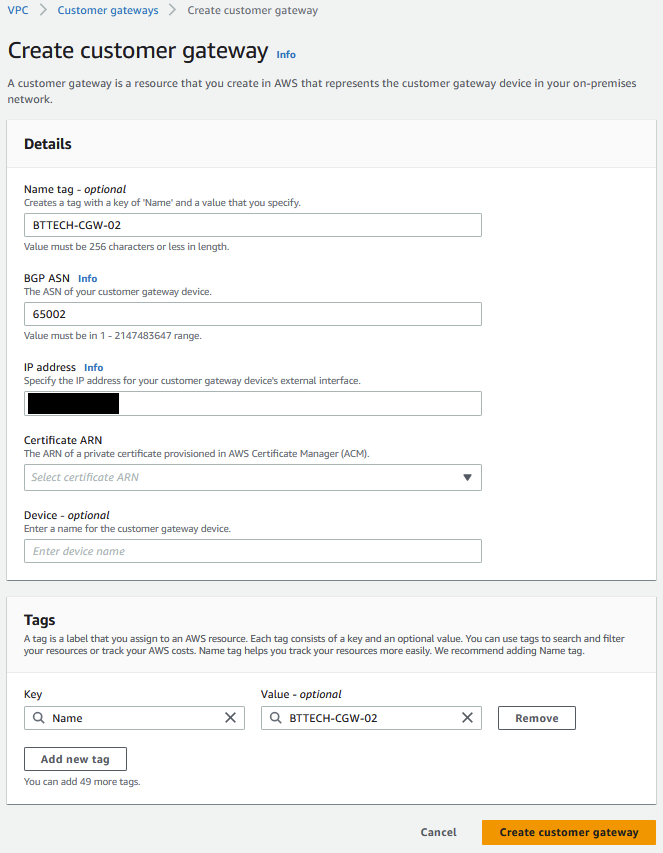
Next step was to create my Customer Gateway. This is a representation of where the VPN connection will be initiated from. As I will be making use of BGP this time I had to ensure that the BGP ASN was set correctly as per my pfSense configuration. Provided my external IP address, gave the CGW a name for identification and left the reset as default.
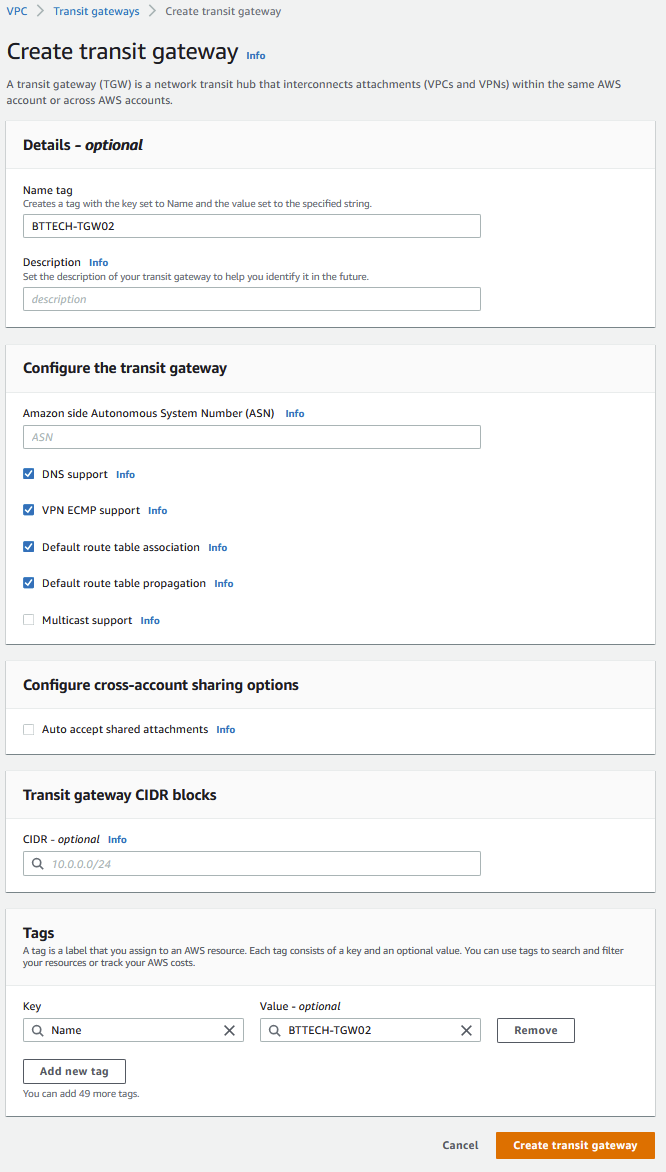
As before I then created my Transit Gateway.
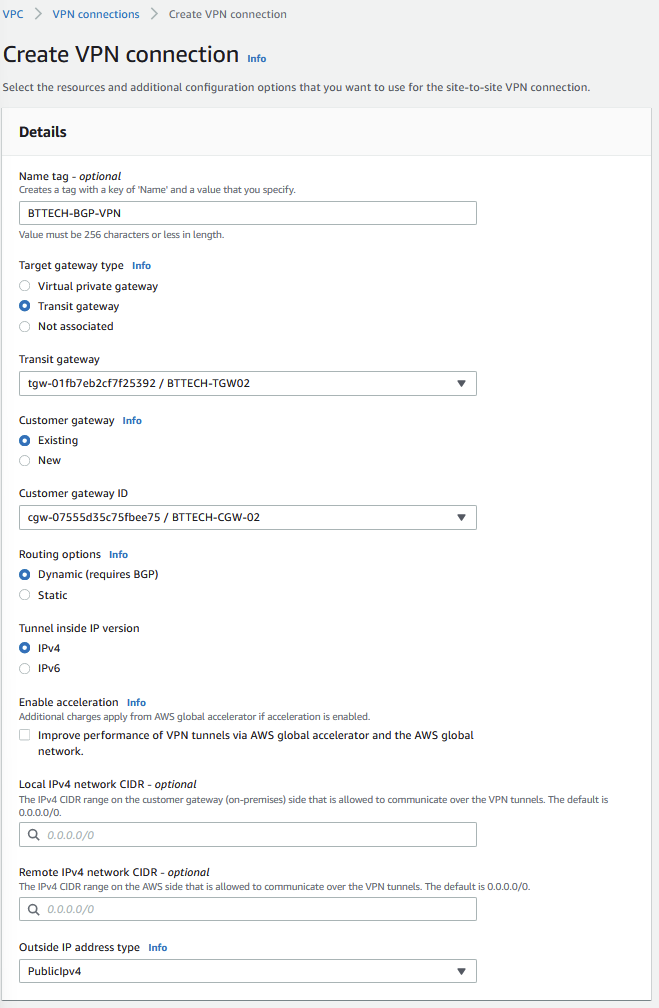
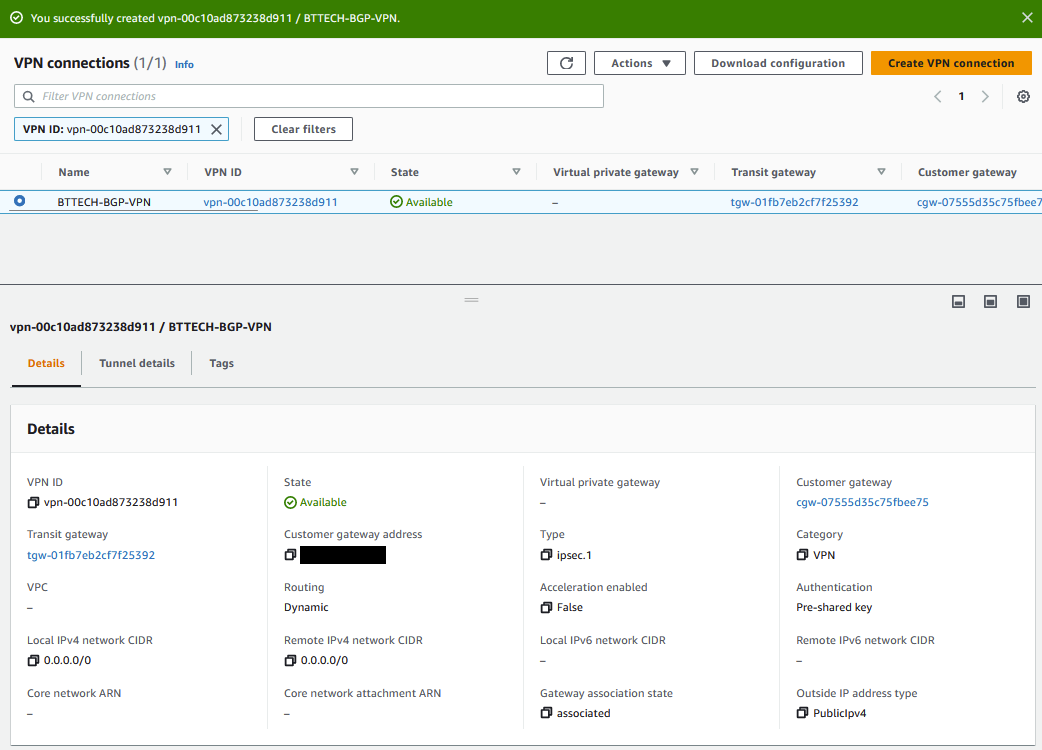
I now move to create the Site-to-Site VPN connection in AWS. Selecting my newly created TGW and CGW and ensuring the VPN connection is configured for Dynamic routing. In this lab, I left all the configuration tunnel options as their defaults.
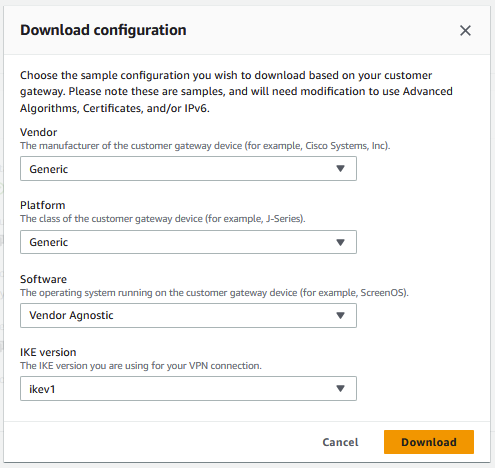
Once the VPN, reports a state of available, I downloaded the configuration.
I used the below values for the configuration download.
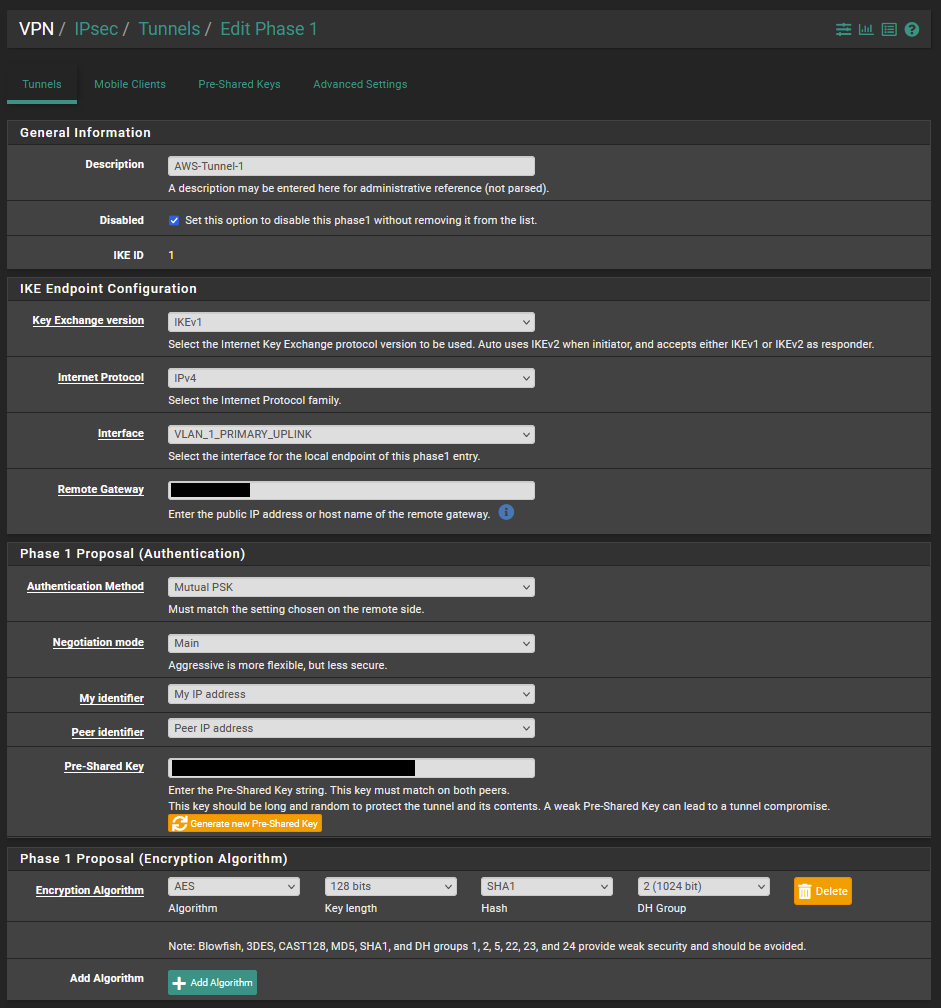
The next step was to move into the pfSense configuration again to configure the phase 1 VPN tunnel.
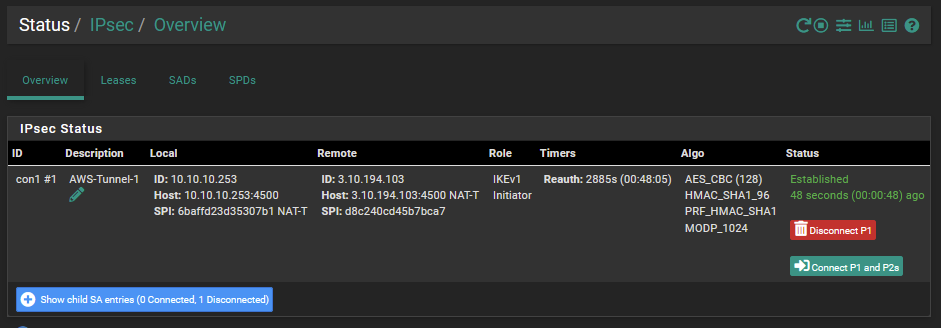
I was then able to connect phase 1 of the VPN as shown from the below VPN status screenshot.
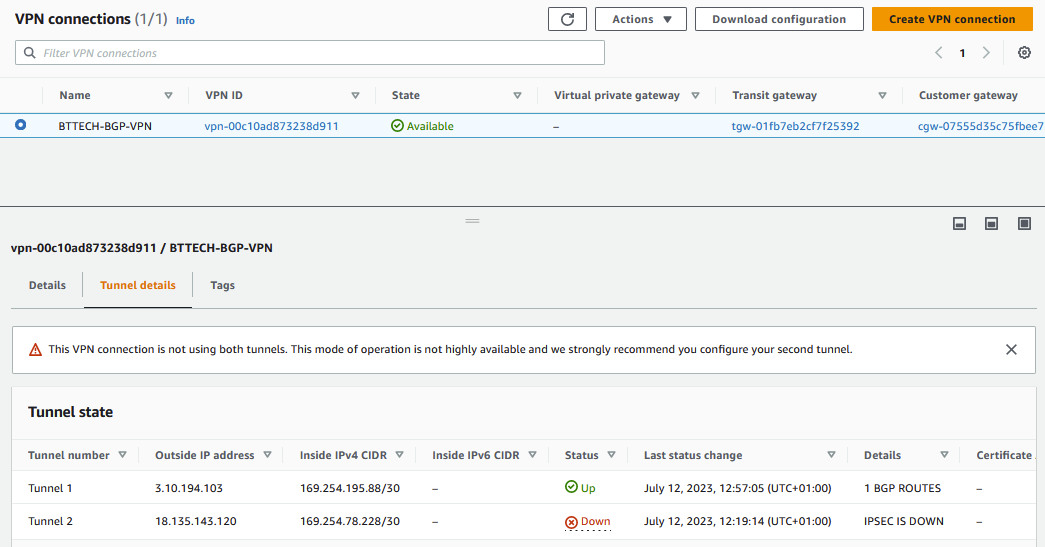
We can then see also from the AWS Console that the IPSEC Tunnel is also up,
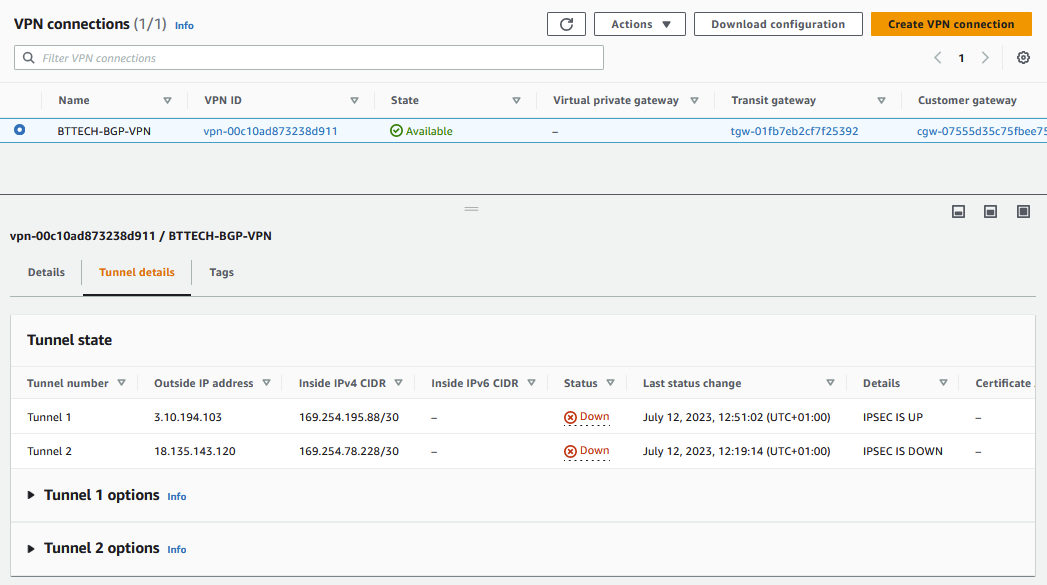
Please note that for the purpose of the lab I am only going to be working with tunnel 1 so no changes will be reported for tunnel 2.
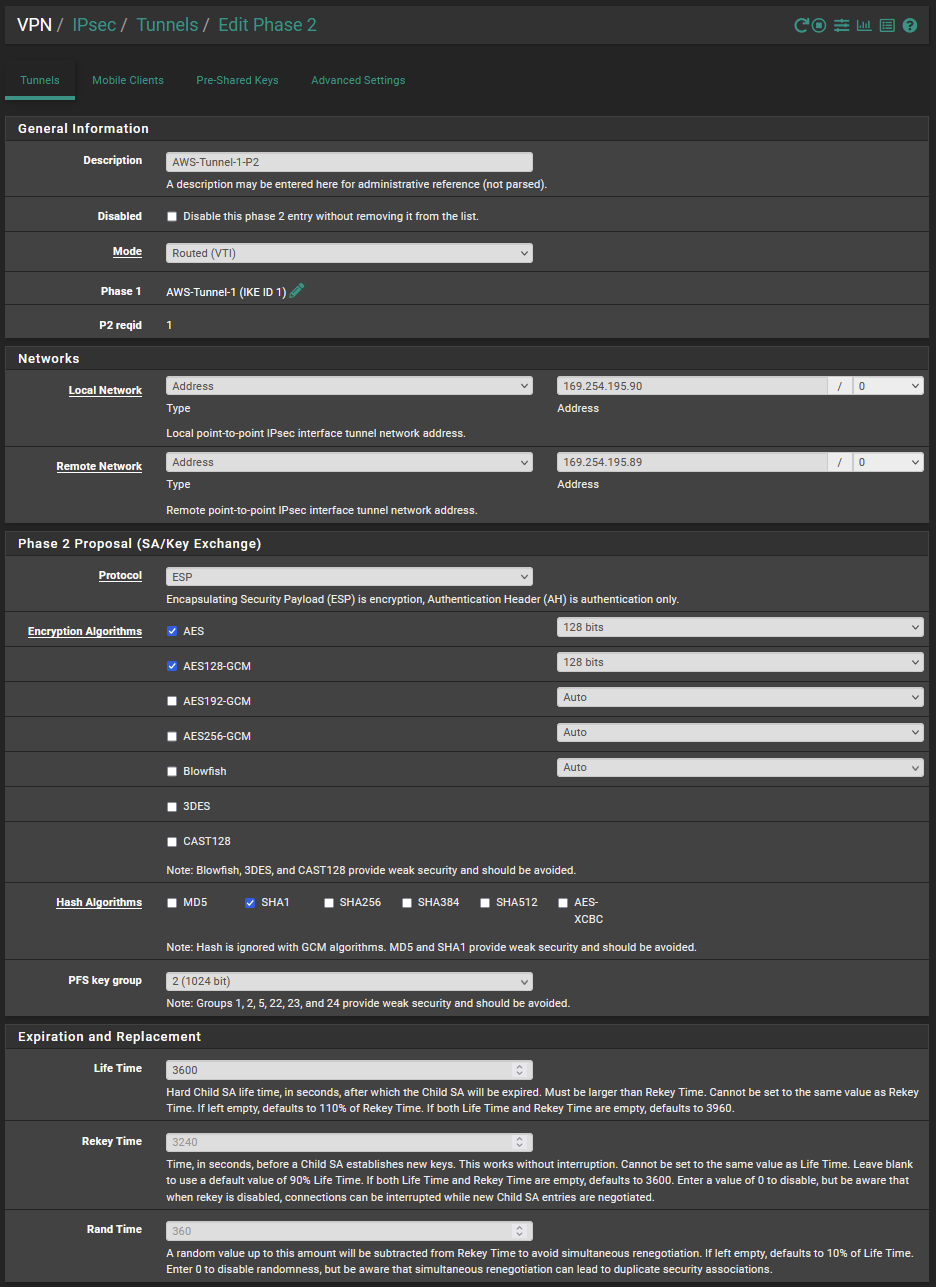
I then created the second phase of the VPN connectivity as per the below.
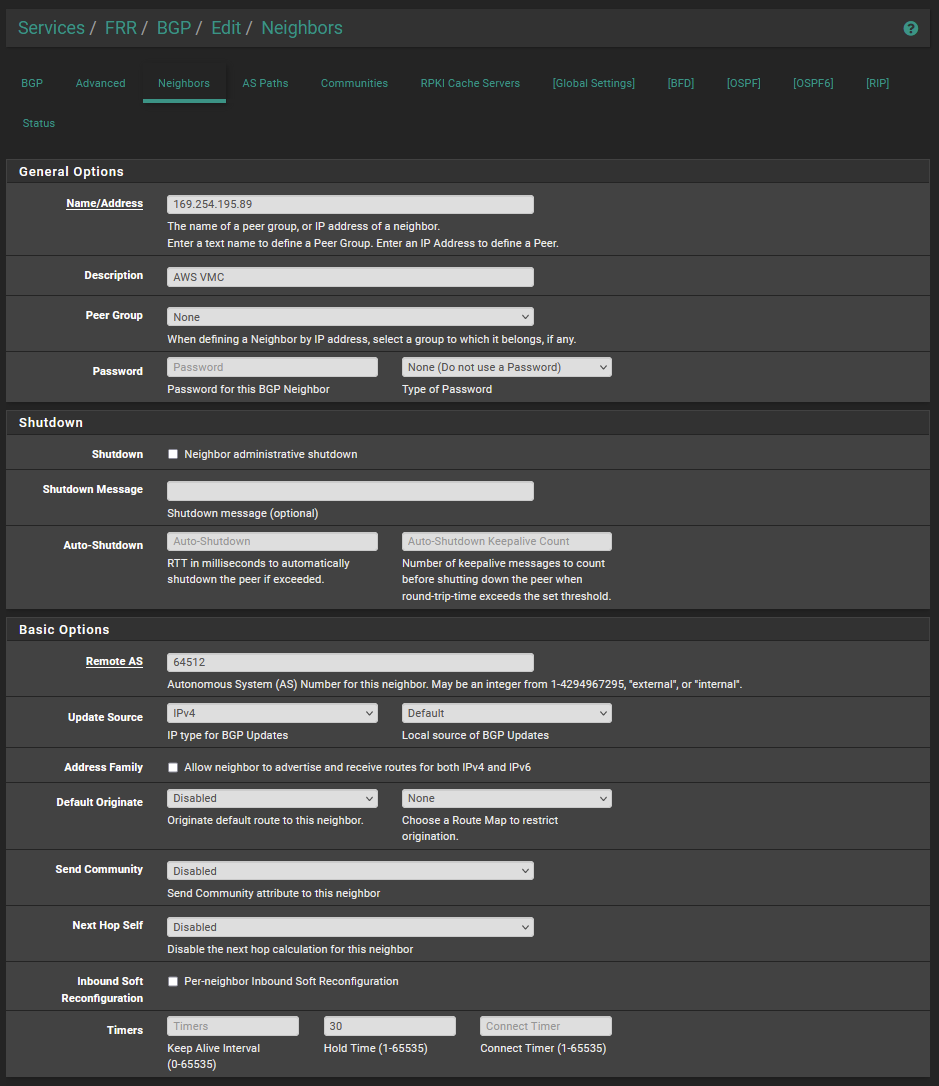
Once the phase 2 settings were configured, I then configured the BGP neighbour as per the below within pfSense.
The FRR package on the pfSense FW allows for command line access. I opened a SSH session to this and moved into the shell. Once there running the following command vtysh to move into the command prompt. Then running sh bgp neighbors to get the below output.
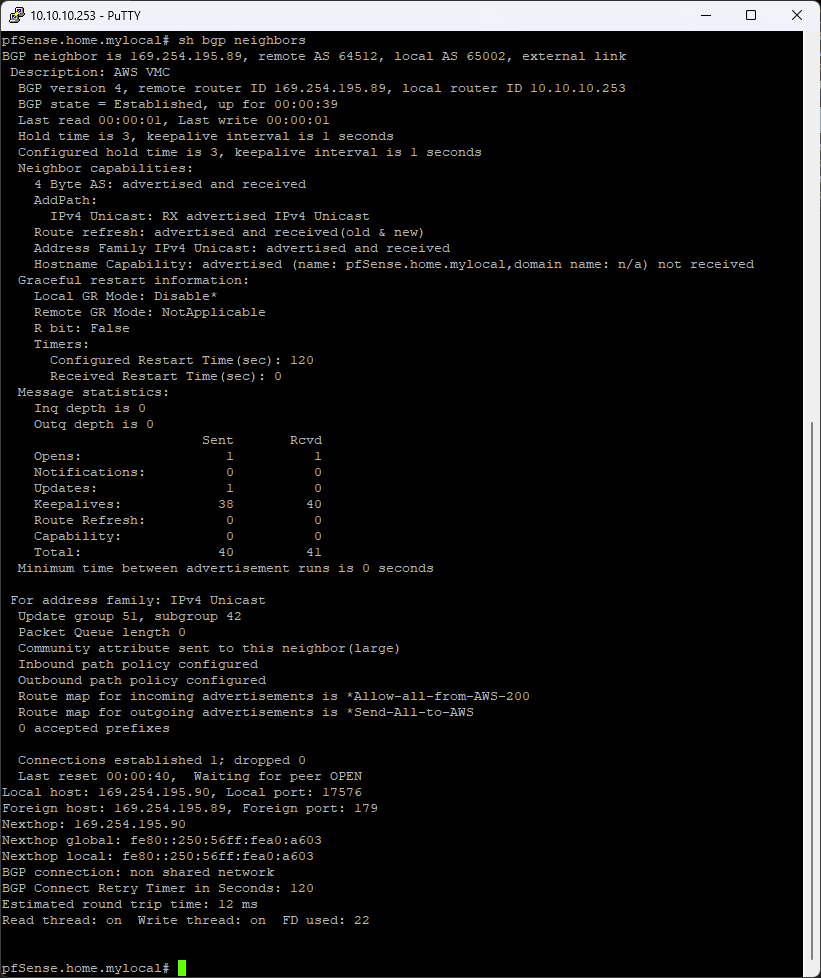
As we can see there the BGP state reports as established. Which is also reflected within the AWS console.
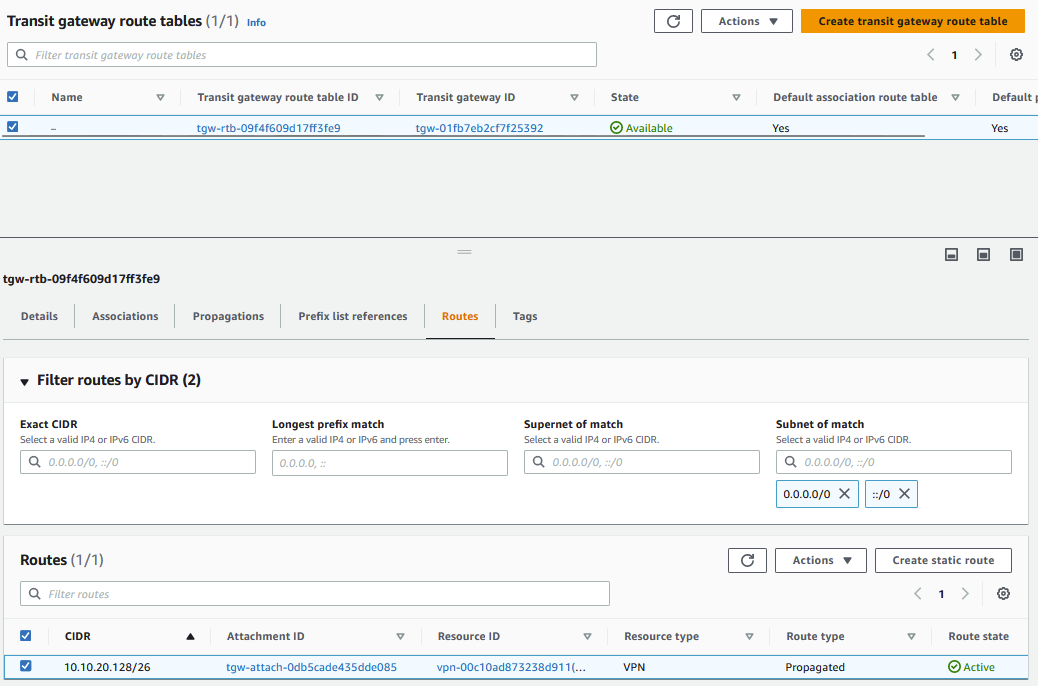
Checking the route table for the TGW I can see the subnet listed that I have advertised from on-prem.
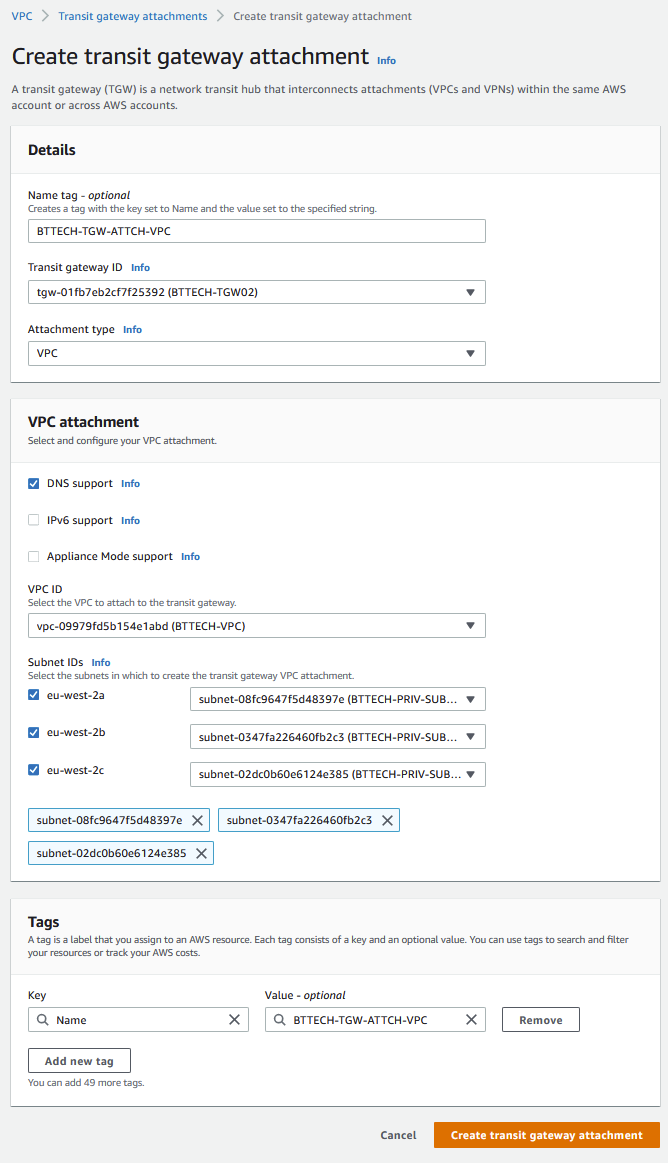
Now the VPN was up and BGP established, I attached the TGW to the private subnets that are configured within my VPC.
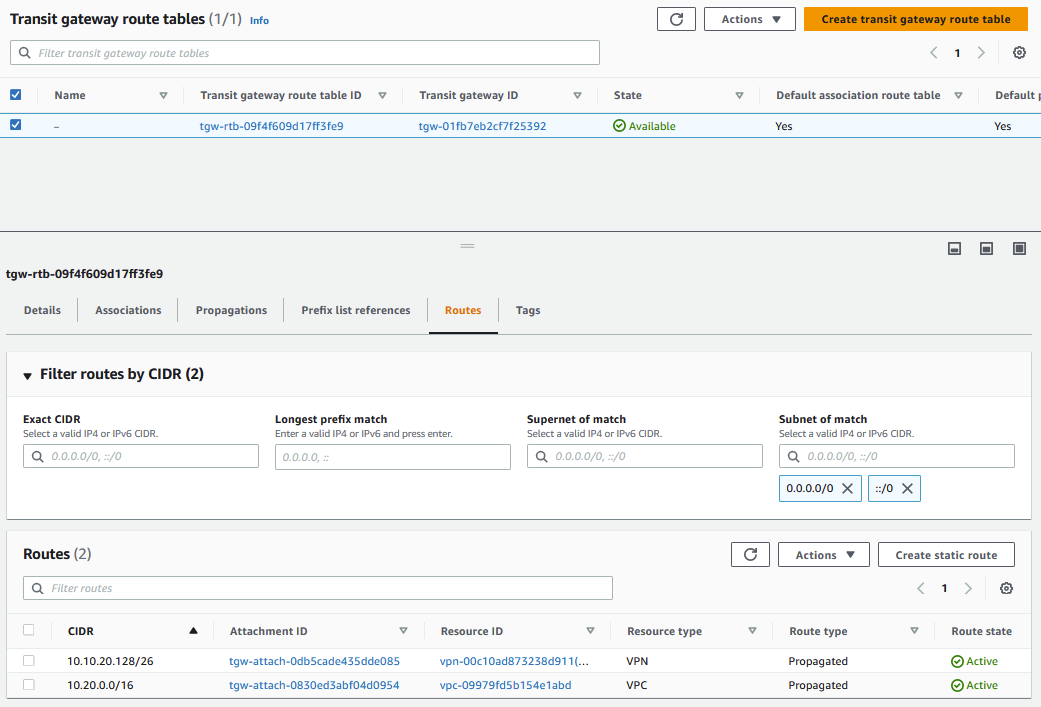
Once the attachment was complete, we can now see that the TGW has routes for the on-prem network over the VPN attachment and the VPC
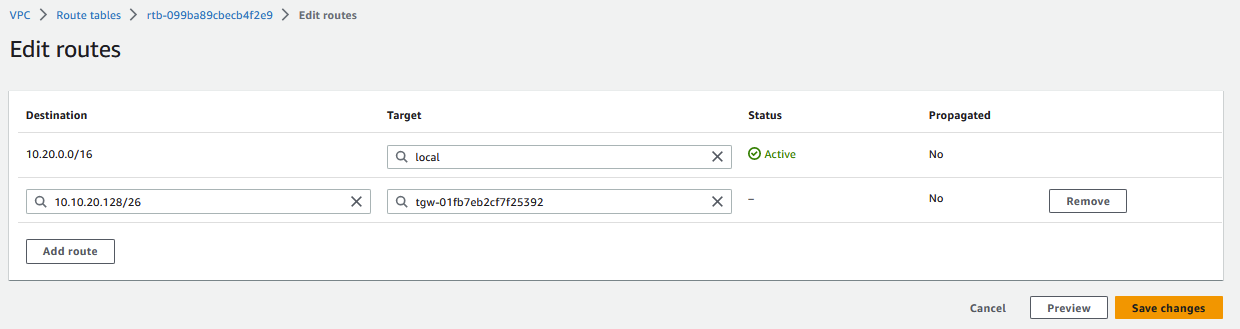
One last step to get access to the EC2 instance over the VPN. The route table that the private subnet is consuming is not aware of the on-prem network. A static route is required here for the 10.10.20.128/26 subnet back to the TGW.
Once this was in place I was then able to RDP to the EC2 instance from a VM running in the 10.10.20.128/16 subnet.